

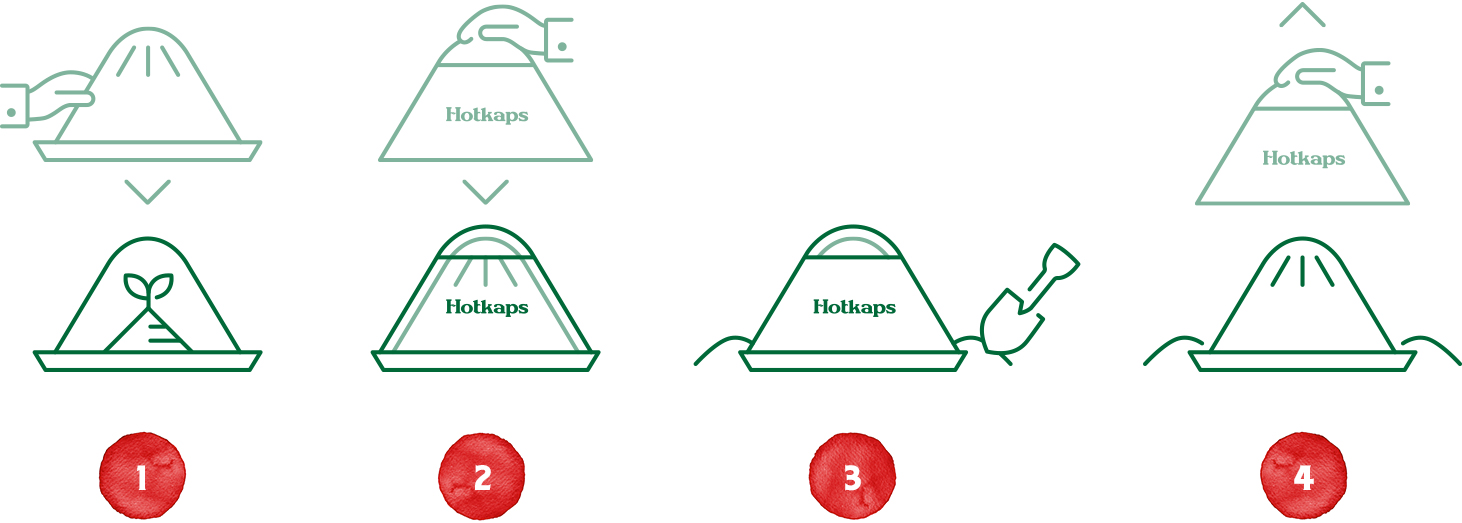
Easy to Place
- Place Hotkap over a seed or plant.
- Place setter over HotKap with the HotKap cuff exposed.
- Cover cuff of Hotkap with dirt to hold in place.
- Remove Setter.
Easy to Water

Dig a furrow around the HotKap.

Or, dig a furrow along rows.
Easy to Vent
Experienced growers recommend cutting a vent hole when a HotKap is set in-place. The following steps can be used during the life of the HotKap.
- Use box cutter or snippers to make a 4” slit in the top of the HotKap.
- As the plant grows, cut another 4” slit in the opposite direction, forming an X on top.
- As the plant grows out of the HotKap, peel back the tabs to allow the plant to expand through the opening.
- Once the plant is large enough, tear away or roll back the paper dome into ground. Biodegrade in place or shred to compost.

When to Use
To protect your plants from frost, HotKaps are necessary when planting prior to the last freeze date in your plant hardiness zone.

For Seasonal Planting info in your area
Plant hardiness zones are based on the average annual minimum temperature over a 30-year period, not the lowest temperature the thermometer has ever hit. They are guides to help you determine which plants will survive in your area. They are not steadfast law. Many circumstances besides hardiness zones, like soil quality, sun exposure, moisture and sudden or prolonged temperature swings, can affect how well plants will do in your garden or field.
There are also always microclimates that will vary within zones (even within gardens). Trust your own knowledge of your property and your garden.